Wednesday, January 29, 2014

Our new dehydrator came in! Here come treats for us and our dog~

dehydrating bananas in excalibur dehydrator on Heading Home Farms

sweet potato dog treats in dehydrator on Heading Home Farms
We are so excited that our new Excalibur Dehydrator came in this weekend. We had some orders for dog treats that we needed to get filled. Plus we did banana chips and apple slices. We sprinkled the apple slices with cinnamon and did the banana chips straight up. We find (especially with this dehydrator) that we don't need to dip the fruit in anything prior to drying and I prefer that. The color change is nominal and the health levels with no additives are supreme.
For the dog treats, we slice sweet potatoes at around 1/4 inch thick and dry them to a pliable and leathery texture. Its a nice chew for dogs and our client's dogs love them. I got this quote from Modern Dog Magazine, which also speaks to making sweet potato treats, too. They say, "Sweet potatoes are a source of dietary fiber and contain vitamin B6, vitamin C, beta carotene and manganese. Most dogs love the chewy sweetness of a delicious dehydrated sweet potato treat. And you can rest easy knowing there's no additiives, preservatives or anything extraneous added." Click here to read their article.
I am looking forward to making fruit leather for the family and also yogurt leather per the instruction book that came with the dehydrator.
I love to dehydrate everything that would normally get wasted. Even left over tomato slices can be dried and stored to make tomato powder. We use tomato powder on pizza's, in soup, and canned dry meals.
What's your favorite thing to dehydrate?
Here's how to dehydrate apples. 

Monday, January 27, 2014

Homemade Gummy Vitamins for kids with Probiotics, too

finished vitamin and probiotic gummies
So this weekend we made a batch of homemade gummies with vitamins and probiotics. First let me speak to probiotics. Interestingly, a cashier in my grocery line was speaking to the lady in line in front of me and she was telling the lady in front of me about probiotics and told her that only liquid probiotics were any good because otherwise the probiotics were dry and therefore dead. This goes against everything I have learned. Yeast is dry on the shelf for months and is still live. I have bread that proves it. Plus if probiotics are live in liquid and not freeze dried, then they have to have something to live on while on the grocery shelf, example, wet yeast wouldn't make it once the sugar supply ran out if the yeast cells were on the shelf.
I am an advocate of dry probiotics which are freeze dried and waiting for "reanimation." Here's a link to an article that speaks to it. There are many such articles and you can make your own decisions.
So I wanted to have vitamins and probiotics in my gummies. I try to make enough for 2 - 4 weeks worth, max, so my little reanimated probiotics can flourish and still be alive when we eat them.

Also please note, I am not a doctor, I am sharing my experiences and thoughts. Please consult your doctor if you have questions or aren't sure what you are doing.

I use only organic bovine gelatin. It's an easy way to start of with a clean gummy that is healthy. You can smell how good it is when you use it!

Now here's the part where I am more persnickety than some on ingredients and portions.
If a dose of probiotics is x amount per person per dose and same with vitamins, then I don't think you should just mix a batch and pour it into molds and see how many you get. If I am adding enough vitamins for 18 doses, then I need to have it make 18 gummies. I am a stickler for that.
Fortunately, I know my molds and how many one batch will fill and I can add probiotics and vitamins accordingly.
So what I do is pour water into my molds and then put that water into measuring cups and know ahead of time how much I need to make.
I also use liquid vitamins instead of vitamin drops, so I know I need two tsp of vitamins per gummy... so if I am making 18 gummies, then that's how many tsps of vitamins I need.

I use these molds because they are big enough for the vitamin amount and also they can double serve for candy making. I don't need a set of gummy only molds. You can use what ever suits your fancy.
The recipe below fills 3 of the trays that I use. I put a teaspoon in the photo next to the finished gummies so you can determine size.


16 teaspoons organic gelatin
1 cup fruit juice (not pineapple)
2 tblsp organic honey (sweetens and gives the probiotics something to live on)
liquid vitamins
and probiotics

I do realize this isn't as tidy as recipes that give a definitive amount, because it is defendent on the size of the molds that you use. That will determine how many vitamins and probiotics.
16 tsps gelatin and 1 cup juice and honey and vitamins make almost 2 cups of liquid. If your molds hold less, then feel free to cut in half.
Just please remember to use vitamin amounts equal to how many gummies you are making.

Add gelatin and juice and honey to a pan and heat until the gelatin dissolves. It starts out very thick and thins out way before boiling. Photos are below.
Then stir and cool if needed (you really shouldn't have to cool that much) just so that it doesn't kill the probiotics. Add vitamins and probiotics and mix well and pour them into your molds.
Pop the molds into the freezer for 10 mins to help set and remove from molds.
There you have it! I store mine in fridge and make only 2-4 weeks at a time.

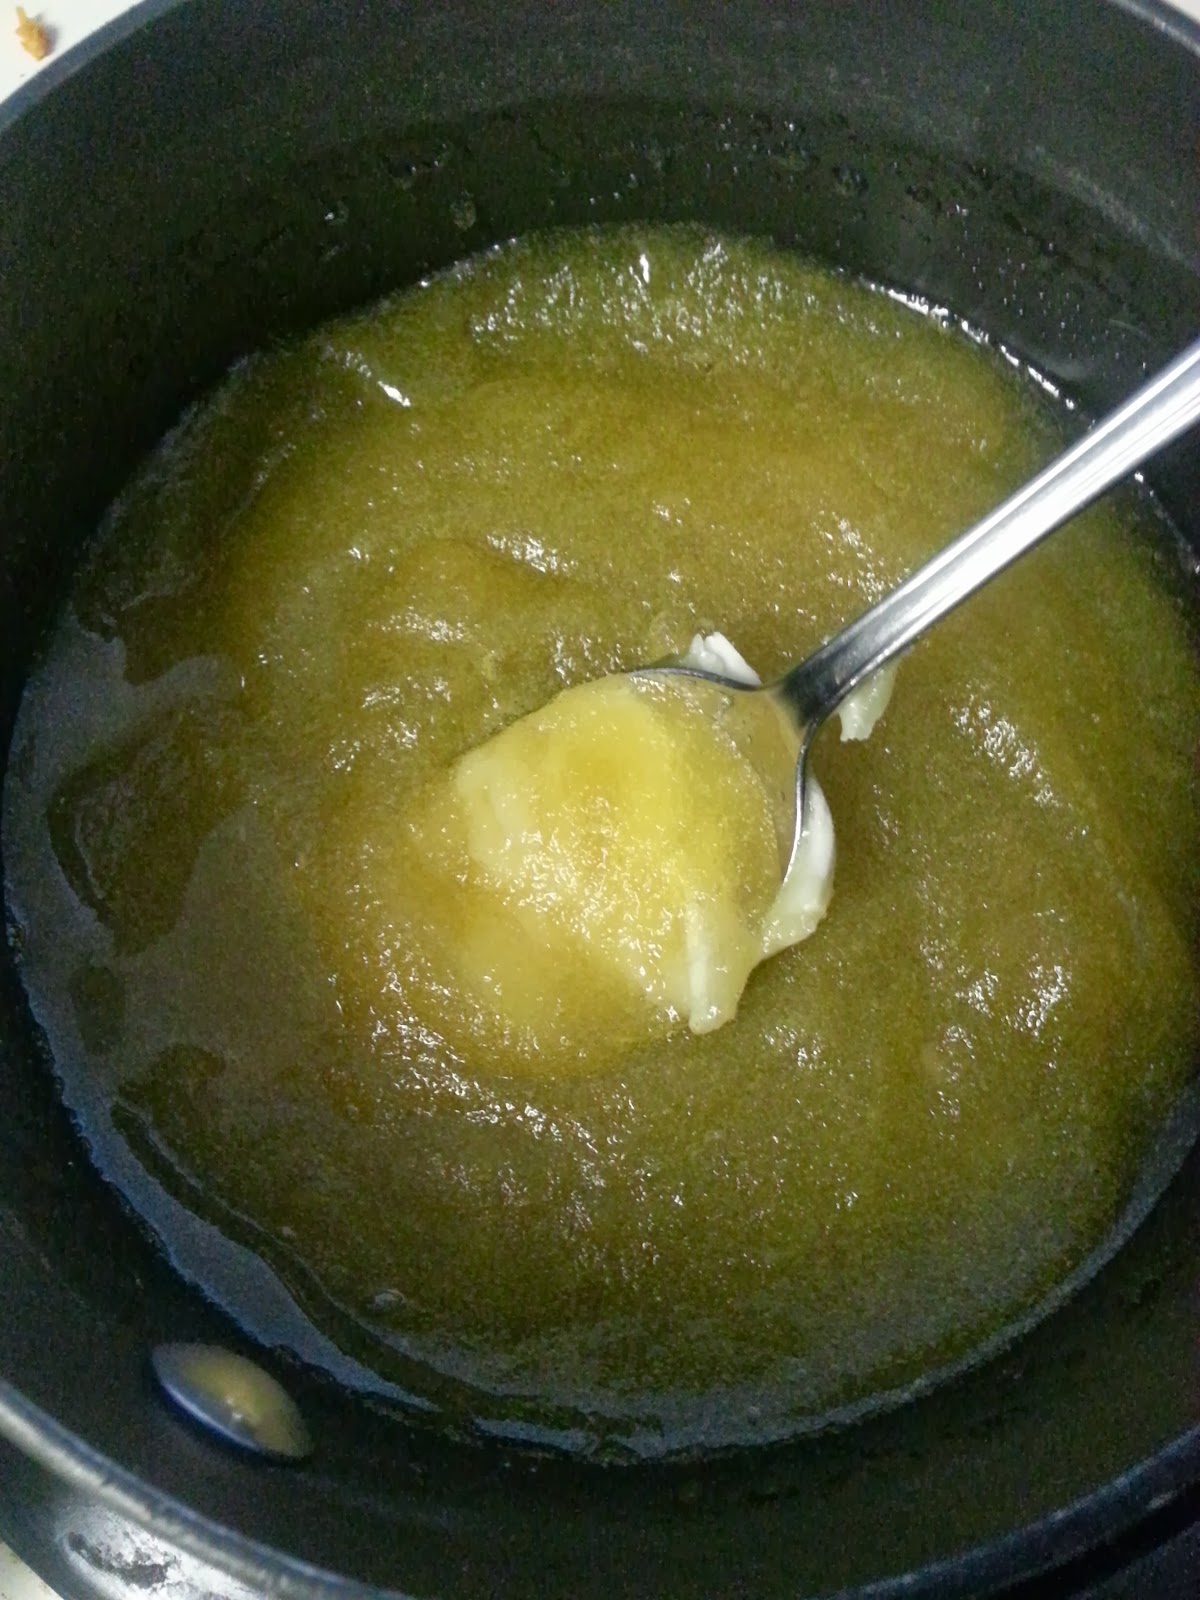
the gelatin, juice and honey is very thick at first

the liquids melting with the gelatin thins out as it warms.

Friday, January 24, 2014

Homemade Hummus

Kris at Attainable Sustainable posted a story about homemade hummus that immediately got me asking myself why I was buying hummus. She offers a great recipe that is easy to make and the parts I love most are:

  • You control the ingredients. We should always know what we are eating.
  • You can make it quickly, and it's going to be fresh.
  • You can make as much or as little as you need.
  • Now I know what tahini is.
  • The word hummus looks weird if you type it too many times.
Click here to try it yourself.

Homemade Carpet Cleaner

Speaking of baking soda, here's a great recipe for homemade carpet cleaner that works great.
This time of year, my carpets take a beating. My mom usually brings her carpet cleaner over each spring and let's me give my carpets a good cleaning, but it's not time yet and hubby can't go through a whole weekend following our "no boots in the house!" policy. Seems he feels that running into the house to get something with his boots on follows the 5 second rule. * sigh *
I tried this easy recipe last night, you would usually have everything in home to make it, and it worked wonderfully! Thanks Popsugar! Click here for the details,

36 uses for baking soda

Robin at Thank Your Body posted a great story on 36 uses for baking soda.
Gives you a lot to think about and follows the natural and toxic free mantra that we are (or should be) moving towards.
I don't think of baking soda enough for cutting grease. I also never thought of using it for gassy beans.
It's worth taking a peak!
ThankYourBody.com

Monday, January 20, 2014

re-usable food wrap or homemade cling wrap

It's super important to me that our homestead reduces waste when ever possible and also reduces our exposure to chemicals.
Cling wrap is one of those things that I pondered this weekend. I can not get it off of the bowls to reuse it, it ends up a wrinkled mess. Even if I could, I can't imagine cleaning it enough to re-use. So I thought I'd take a peek out there and see if anyone had any ideas and I found more than I thought I would!

DIYNatural.com has a great idea using cloth and and iron.

NourishingJoy.com has some interesting things to consider when choosing your material.

TheArtOfDoingStuff.com includes ideas with buttons and alternatives to bees wax pellets.

We'll be trying this out soon.

Please let us know if you have done this yet and what your thoughts are!

Thursday, January 16, 2014

Homemade upcycled kitchen island - countertop - bar - extention - project thing

If hubby and I were to do a home improvement show on TV, the show would not make it on air due to the amount of time that the beeping coverup sound would be occurring to cover my husband's potty-mouth. Mind you he does not always talk like a drunken, ship-wrecked pirate. Yet during home improvement he does. He gets crazy and swears and throws things and has the patience of a flea. Yet he is also strong and determined and thankfully has the same taste as I do.
I remember my mother asking how I was going to get something pulled off of something else and I said to her, "I just wait and let BD get mad and he will get it done". And he did. He does every time. I love him.
So any-hoo... we had a twin trundle bed that was doing nothing in our junk middle room. It was a lovely bed in brand new condition but we didn't need it. AND because we had it, BD felt that it was his clothes placing surface where he placed dumped much of his clothing for no real reason.
The bed is very similar to this:
Close enough. So I took the entire bed apart. Every screw and staple and piece removed and was determined to make something cool from it. We needed an island/bar/extention to the island in our kitchen so we figured out how to re-purpose this bed into a cool countertop/island/bar thing.
There are tons of slats holding the top and bottom mattresses. Each was stapled to a white connecting string. We took each staple out and make a pile of the wood. Then we took out every nail and screw and connector to the rest of the frame. We haven't ended up needing the headboard or footboard yet. Oh yeah, this project was going to be one of those times where you turn a bed frame into a bench. But we just didn't need the bench. 
So island is it. We used the side board running along the trundle for the front edge of the table. We used other more narrow frame boards and attached it to the wall and back of the cupboards to make the frame.
We used the headboard legs to make the front two legs of the table. 
We used the existing 1x1 edge pieces that held the lats for the mattresses and ran them vertically to make a butcher block style table top.
I wish I had taken pics along the way to show you, I know I should have, but BD was on a roll that day and electronics were better off not in the room. 
Here are some pics of the finished product that I think do it justice. Please let us know if you have questions.  It wasn't that complicated. I could not be happier that it is repurposed. We are deciding on a finish. 
And next are the countertops. And the floor. Don't look at our floor : o

we are so in love with this look. we sprinkled in a few pallet pieces to give it a cool look
this is a corner that tied directly onto the back of the counters on the island part.
we used the long side pieces of the bed frame to make the square frame for the countertop. we used the little 1x1  peices that hold the edge of the lats to rest the lats just below the top of the long frame pieces so they would be level with the edges.
corner piece, still no looking at our floor, please. we will be using cork to fill in the holes. (on the countertop, not the floors)

Wednesday, January 15, 2014

DIY countertop solutions and projects

We will be re-doing our kitchen countertops this summer. We have dreamed of granite but the expense seems silly when there are so many options that look marvelous and that we can do ourselves (hopefully). We are just about to finish the pine island extention (pics coming soon) and the countertops will make the kitchen pop. Here are some of the ideas we are considering for covering up our laminate countertops...

~Wood replacement countertops DIY.


This one can be found at CleverlyInspired's page . Great for sections that aren't heavily used work sections.


~Then there is painting existing countertops to look like granite. Here is an article from the FunTimesGuide Homebuilding section.


~Then there are thin cement overlay techniques (we think we're going to try this technique) that can be found at HomeDIT.com.


~Last idea is to lay tile over the laminate. I love this page from Ron Hazelton because it gives very clear directions and video to go with it. (Visit his page to play the videos)


If you want to share a technique or style of job that you did, please let us know. We love to see the work that our little tribe has done.

Wednesday, January 8, 2014

Homemade Sore Throat Drops


Ok, I fully admit and acknowledge that these are fairly odd looking throat drops. 
Ok, I also fully admit and acknowledge that they look like... well... animal droppings. BUT these things are awesome, work great, are chemical free, organic and natural. So it's true they have no preservatives or natural coloring but they work.
I don't offer these on my site because it's too hard to make enough of these for open sales. I make enough for my family and friends and for specific pre-sales by clients who request them. Making them is pretty easy, it is the rolling and wrapping and storing that is harder in large quantities because they are organic and somewhat fragile little drops of goodness. 
Before we get to making them, let's discuss the taste. They are organic and there is no artificial colors or flavors. That being said, these are pretty good! They have a gentle earthy honey taste. Any child I have offered them to has also liked them as long as they are prepared to NOT expect super wild double cherry sour candy.
These drops not only provide relief for your throat... they offer the benefits of each ingredient including organic, unpasteurized raw honey which has antibacterial, antimicrobial and pro-biotic properties. Plus vitamins and a bunch of other great properties that you can Google should you be interested.
These also contain Echinacia which works to cure and prevent colds, marshmellow root which is used to treat mild respiratory symptoms, including cough, and slippery elm which can relieve coughs, sore throats, diarrhea, and stomach problems. *** insert disclaimer here. I am not a medical professional. These products are to be used at your own discretion, I am simply offering advice and telling results from what I have experienced.
I usually lose folks at the mention of marshmellow root because not that many people have it in their homes and that's when my clients just start asking me to make it for them. You CAN do it yourself by following the recipe below.

You need:


Place all ingredients together in a bowl and start mixing and cutting them in together. It almost feels like pie crust at the beginning. I can't describe the process in words as well as the photos below illustrate.
It does take about 6-7 minutes of pressing and mixing to get it completely mixed.
Then you roll them into little balls using about 1/4 to 1/3 tsp of product. 
I put them on parchment paper and stick them in the fridge for about 4 hours to firm them up a bit before I wrap them up individually in the parchment paper.
Please note they will always be slightly soft, they are never going to be hard candy-like cough drops. Nor should they be.
Keep them in a sealed container and they will easily last for a month.


it almost feels like pie crust when you start cutting the powders into the honey.
i press a lot with the back of a spoon. 
throat drops. they taste much better than they look.

Friday, January 3, 2014

Coconut Oil Chocolate Bars.... what???

Will be trying this over the weekend. It totally seems like a great alternative for candy filled with artificial flavoring and colors.
We are considering peanut butter or orange oil like some of The Coconut Mama's followers suggested.
Information is on The Coconut Mama's Site. 
If you have made this, please let us know what you think.