Wednesday, December 30, 2015

9 Cool Organizing Ideas Using a Tension Rod That You May Not Have Thought Of Yet


I have two things on the homestead that need addressing this week. One is I have a few tension rods unused in my closet. Second is my home which is getting pretty holiday-time messy. 
So it's time to organize and I found these great ideas to use tension rods. In fact, I am so inspired that I am ordering more tension rods. They have so many cool uses that I have come up with more along the way.


1. This one I am doing right away. JenThousandWords.com did a beautiful job organizing under her kitchen sink with a tension rod for her spray bottles. You can read more here.


2. This idea comes from KellyHicksDesign.com. She uses a tension rod at the bottom of a curtain in her bathroom to make a clean design. Her blog for more info on this idea is here.


3. What about using tension rods in your drawers? MontanaPrairieTales.com shows an ingenious way to organize plastic storage lids here. I will be using this idea with my canning lids and rings. Plus you can use a tension rod to hang your canning rings up under a cupboard or at the top of a pantry shelf. 


4. This article by OneGoodThingByJillee.com shows how much nicer wrapping gifts would have been this year if we'd done this last year. Let's make Christmas 2016 a bit more organized!


5. BHG.com shows a cute way to hide the clutter of things and cords under a table or desk by hanging curtains on tension rods between the legs of the table/desk.


6. A great way to use extra space in the closet is to run a tension rod from front to back along the side wall and hang extra jewelry, scarves or small clutches from it. This idea came from Pinterest. 


7. I am so doing this one right away, too. OneGoodThing.com shows how a tension rod along the back of a cupboard can elevate and organize spices! Sweet!


8. Tension rods used vertically in a cupboard help to keep cutting boards, lids, cookie sheets, baking pans and a host of other items both organized AND taking up less space as shown on BHG.com.


9. TheHouseOnMillsBrook.com shows us that you can make any drawer into a hanging file drawer with tension rods. I am doing this this weekend, too.

Please send us photos of any tension rod projects that you do and we will share them with our beloved readers. 

And while we are using things in a new way, here are some ideas of things to do with mouse pads and things to do with bath puffie scrubbies


Tuesday, December 29, 2015

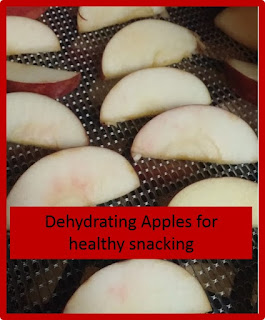
Dehydrating Apples for Healthy Snacking

dehydrating apple slices for healthy snacks

So we just dehydrated apples because we had quite a few and I didn't want them to go to waste. Apples are very easy to dehydrate and make a great snack. Especially for the healthy New Year New You : )

I use my Excalibur Dehydrator, which I love. 

Frankly I don't do anything to prep the apples, like citric acid or lemon juice, because I find that they come out just fine without adding anything to them. (There are links below to directions should you decide that you do want to do this, but our pics show that you don't really need to do this step).

1. Slice your apples. Peel them first if you'd like. We don't do that, but you could.
I use my handy dandy apple slicer to get uniform and thin slices and plop them on the trays. 
2. Sprinkle lightly with cinnamon. (optional)
3. Dehydrate at 135 degrees (F) for 6-8 hours. This batch went in for 8 hours because these McIntosh and Delicious Apples were pretty juicy. 
4. Store them anyway that works best for you.
dehydrating apple slices for healthy snacks


You can seal them in bags or jars and they will last 4-6 weeks. 

You can also use your Foodsaver to have them last longer.
I save all glass jars from anything, like spaghetti sauce, gravy... and use the jar sealer attachment on my food saver to seal them up. You can also, of course, use mason jars. 

You can also add another hour or two to the process and dry them all the way to apple chips. Apple chips last longer because more of the water is removed. My family just prefers the regular apple slices less dry.

This link gives some directions for ascorbic acid and lemon juice to keep your apples from browning during the process if you'd like to include that step. Again, I don't because it's never been an issue for me. 

You can check out our dehydrating dog treats page if you're in a dehydrating frame of mind. 

Thursday, December 24, 2015

Some Up-cycling Ideas and New Ways to Re-use Old Mouse Pads


While cleaning out the office today I just came within 2 inches of throwing out an old mouse pad.
"No!", I said to myself. If we are going to stay on track towards homesteading then we have two mantras to keep in mind to save money. 
1. Don't just buy new stuff.. try to make something rather than buy it.
2. Don't waste old stuff. Everything should have a new purpose. (here's what we did with our old twin bed frame, we made a kitchen island!)

So what can you do with an old mouse pad? Here are some ideas that I found.

The most popular thing out there seems to be using it for a trivet if the top or bottom doesn't have plastic coating. This is a great idea. See it here on RealSimple.com.
From RealSimple.com
InspirationsForMoms.com has 5 other cool ideas. She writes:

 1) Quiet your cabinets. Cut your mouse pad into nickle-sized circles and glue them to the corner of cabinets doors. Say goodbye to those loud bangs!  
3) Catch the condensation. Cut up some mouse pads to use them as drink coasters.
4) Open jars with ease. Use the rubber underside of a mouse pad to loosen the stubborn lids of jars or bottles.

From InspirationsForMoms.com

5) Line your dish cabinets. Yes, cabinet liners are pretty cheap. But if you have old mouse pads just lying around, they are FREE. Place them in you kitchen cabinets to protect your dishes.
6) Protect your floors. To prevent table legs and chairs from scuffing your floors, cut your mouse pad into small pieces and glue each piece to the bottom of a leg.
You can visit her blog here.
We also have a post on recycling bath puffy scrubby things here.These are some really valid and great ideas and I will be a few of them.
If you have any other ideas, please let us know so we can add them and share them.


Saturday, December 19, 2015

Ally's Christmas Crack - a Tasty Sweet and Salty Treat


This taste sensation was introduced to me by one of my co-workers. Ally brought this in to share with the office and it disappeared within minutes. 
Here's what she told me to do...
You need about 25 saltine crackers,
1 cup light brown sugar
2 sticks of butter
12 oz bag of chocolate chips
Optional walnuts, broken candy cane pieces, broken cookie pieces or what ever typing seems fun to you.
Line a cookie sheet with aluminium foil and spray with non stick cooking spray.
Layer the crackers across a cookie sheet in a single layer. 

Preheat oven to 325 degrees.
In a medium sauce pan, melt the 2 sticks of butter and one cup of brown sugar. Stirring constantly, bring the mixture up to a boil and let boil for 3 minutes. It will turn a nice caramel color.

Poor the caramel over the crackers evenly.
Put the sheet into your preheated oven for 3 to 5 mins. Keep a close eye on it. You just want it to start bubbling. 
Remove from oven.
Sprinkle the chocolate chips over the pan. The heat will soften the chips until you are able to spread them out over the whole pan. 

If your going to add toppings, now is the time. I added walnuts because that's what hubby-licious likes. Smashed candy canes would look pretty. That's what I am doing for my next tray because they are going to be a hostess gift.
Place the pan in the freezer for 15 mins.
Take the pan out, lift a corner of the candy and start breaking it into pieces.
Serve, enjoy and watch everyone's happy faces while they eat this.
It makes a great hostess gift of you make a batch and put it in a cute container or basket.
Thank you Ally!

Friday, December 18, 2015

Sea Monkeys (yes, sea monkeys) as a muse for Permaculture Gardening


Even auto correct is concerned that I am typing about the right thing and is trying to auto correct the capitalization of Sea Monkeys as we speak.

These are such a fun throw back to child hood for me. They make a fun little smile gift for people and I have some that I care for in my office. No one at work is allergic to Sea Monkeys : )

You can buy them here.

The real reason that I am writing about them beyond their cuteness and the affinity I have for my little guys after having received them as a gift from Emily, is that they are a little microcosm that has me reflecting on permaculture gardening. #Permaculture gardening is developing a space until it meets all the needs of its inhabitants, from food and shelter to fuel and entertainment. 

When you first get your sea monkeys, they come with the shelter (the container) and food, the starter stuff for the water and also a little turkey baster type thing to aerate the water. 
They are not self sustaining. You need to add food regularly and also aerate the water just about every day for them to grow and live in your office as pets. 
Eventually, how-ever, you can foster an environment where algae starts to grow in the little tank. I was super excited the first time I saw that the algae was growing and there were little tiny air bubbles coming up from it. My monkeys were on their was to a self sustaining permaculture environment! It takes a lot of pressure off of 3 day weekends : )
Permaculture emphasizes the use of native plants or those that are well adapted to your locale. The goal here is to plant things you like, while making sure they have a purpose and benefit the landscape in some way. 
The algea in the tank acts as a food source for the monkeys and also by aerating the water, they are no longer dependent on my to sustain life! 
I want to take this premise and move forward for the planning of my permaculture garden and land for 2016. How can our land better sustain itself and us? What steps should I take first. What needs will be met? 
I'll post more on this in future blogs as I move along in the process. 
I'd love to hear your ideas and see what you have done if you have a permaculture set up in place. 
In the mean time... here are sea monkey tips for newbies who plan on getting these cute little guys (Sea Monkeys)
Sea monkeys #permaculture
:
1. Follow the directions clearly for setting up your tank. 
2. If you can't do a north facing window, just leave the side of the box up during the super sunny days.
3. Feed them on Tuesdays and Fridays and only use the small side of the scoop. Feed them even when they have algae. It's a treat.
4. Be super happy if algea starts to grow for you, too. It takes a few months.
5. Aerate the tank every day until you get algea. (they will make it over the weekend)
6. If you cycle through and don't get babies to keep your tank full, you can buy regular brine shrimp. Only use the little scoop side to pour a tiny amount in your tank. You get TONS!


Friday, November 27, 2015

7 Thanksgiving Stuffing Leftover Ideas


Today starts the leftover Thanksgiving dinner season and I have gathered 7 great ideas for you to try.


1. This idea gets bigger every year. The Stuffing Waffle. JustATaste.com has directions on this more modern leftover idea here. 


2. BeardandBonnet.com gives us the Stuffing Popper. This sounds great and is vegan and gluten free (depending on your stuffing to begin with. you can't un-meat stuffing : ) Recipe is here.


3. ABC brings us the Turkey and Stuffing Pie. Anything in cast iron has to be good! Here's the recipe.


4. SimplyHealthyKitchen brings us Stuffing Biscuits. They tout them as a great copy of Cheddar Bay Biscuits. Let us know if you make these : ). Here's the recipe.


5. Dinner-Mom.com gives us a scrumptious looking recipe for Stuffing Muffins with apples, cranberries, onions and more. Nice to wake up to on a Saturday in November! Here's how to make these. 


6. PocketChangeGourmet.com is showing us mashed potato and stuffing patties. Using two great leftovers at once. Here's how...


And number 7 is from 365IshPins.com. Stuffed cheesy mushrooms.... drool. Here's how.

Tell us your favorite thing to do with your leftovers. We love new ideas!


Monday, November 23, 2015

My Husband's Favorite Homemade Cranberry Sauce

Homemade Cranberry Sauce

You need:
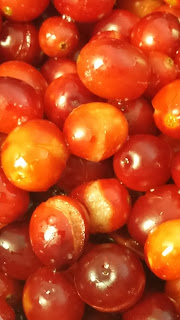
2 lbs cranberries
3 cups cranberry juice
3/4 cups orange juice
12 oz maple syrup ( not pancake syrup)
1 to 1 1/2 cups sugar (one cup until you taste the syrup and decide for yourself)

Rinse your berries. Remove any little sticks and bad berries. 
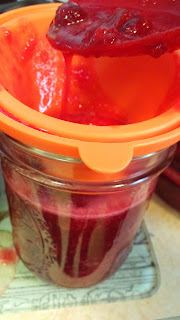
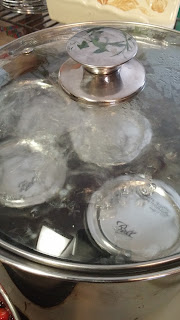
I also get the water bath canner ready now. Get the water hot. Make sure you have rack on the bottom of your water bath pan. I am using a smaller pot this time and I don't have a rack that fits so I am using canning lids. 

Have 5 sanitized pint jars ready.

Put all of the ingredients in a large pot. Ours is a less sweet recipe. You can take a quick taste of your liquid now and add the additional half cup of sugar now if you would like.


Put it on high heat and bring to a rapid rolling boil stirring constantly.
removing foam when making cranberry sauce


cranberries start to pop when making cranberry sauce
The berries will start popping while they split open. It needs to be a true rapid and rolling boil to start releasing the pectin from the berries. 

Turn the Heat down to medium low and simmer for 10 minutes. I use this time to skim some of the foam out. I am not that worried about the foam. If you are a perfectionist... There are a few ideas to get rid of almost all the foam here

To us is not important.
After the 10 minutes you start filling your point jars. This batch will fill 4 pints jars with just enough left over for a tasting. 
canning cranberry sauce

Put the point jars in your water bath. Make sure the water covers the jar, pot your plus on and raise the heat so the water boils.
waterbath canning homemade cranberry sauce

 Time for 15 minutes. After 15 minutes turn the heat off. Remove your jars and wait for those beautiful pings. 


Wednesday, November 18, 2015

3 Uses for Tea Tree Oil

I love Tea Tree oil. I strongly believe that it has been one of the biggest factors that has helped me through the "Back-To-School-Time-So-Everyone-In-The-Office-Is-Sick" window this year.


There is even a company that uses Tea Tree Oil as a major component of it's product to prevent mold and smells from accumulating in winter storage of things like boats.

We do have to be mindful of the realities of the product. One thing that irks me is that there is so much info on every thing online from Essential Oils to Asparagus and how everything cures acne, and cancer. If Tea Tree Oil and Asparagus cured cancer, we wouldn't be finding out by stumbling across an online story. It would be too big : )

This in no way detracts from the super cool benefits that Tea Tree Oil really brings! I love it for fighting germs, skin care and cleaning.

Tea tree oil is also known as Melaleuca oilIt comes from the leaves of the Melaleuca Alternifolia tree. It is antimicrobial, antibacterial, and a fungicide.

It is really only safe to use externally. I do use it for breathing in, but not in concentrated forms. I will leave a container of it open on my desk and let the scent fill the room, breathing it in that way. I also will take a quick sniff directly from the bottle if a sick person comes close to me. I believe in this greatly. Also, I am not a doctor : )

Here are 3 things that in my experience are real.

1. KeeperOfTheHome.org writes a great article on using it to treat skin ailments. I have personally used this oil for skin treatments and have been impressed.


2. SmithsInspirations.com writes about using it to keep bathrooms fresh. I totally agree with this use. It works well with the properties that Tea Tree Oil possesses. 


3. SheUncovered.com uses Tea Tree Oil in a facial toner. I use witchhazel rather than water. I like her idea, too. 


Monday, November 9, 2015

Apple pie moonshine


This recipe for Apple Pie Moonshine is a culmination of various recipes that we have tried over the years and have adapted to suit our taste. We certainly aren't saying we invented it. We aren't trying to take credit for anyone's recipe. There are so many recipes out there. 
Last year's batch wasn't strong enough for hubby's liking. The year before that it was too sweet. This year we are going to try adding the spiced rum that seems to be big this year..
The recipe listed above is a pretty big batch. Almost double many that are out there. This one makes around 10 quarts.  So feel free to cut it in half if you are just starting out.

2 gallons of cider
40 oz Apple juice
Cinnamon sticks (2 for the pot and one for each container that you will use)
4 cups white sugar
4 cups brown sugar
2 liters Everclear
2 to 3 cups Captain Morgan Spiced Rum
2 to 4 apples (green and red are our favorites)1 to 3 cups vanilla vodka


 Pour both gallons of Apple cider into a large stock pot. Add the brown and white sugar and two cinnamon sticks and simmer on low heat for 10 minutes stirring almost constantly until the sugar dissolves. You can tell when the sugar melts because you won't feel that gritty feeling at the bottom of the pot with your spoon when you stir.
Then turn the heat up to medium high and bring it almost to a boil stirring frequently. Just before it boils (you'll see it starting to steam) turn the heat down to a low simmer and simmer for 1 hour. Keep stirring occasionally. I don't cover mine during this process because I like to have it reduce slightly.
Then you remove it from the heat and let it sit until room temperature.


Right around now I divide it two pots so that I have room to add the alcohol. You have to be very patient here. It needs to cool all the way down to room temp or you will accidentally be burning off alcohol content.
When it's at room temp, you can add 1 liter of Everclear to each half pot now. I am also adding half the bottle of captain Morgan to one and about 2 to 3 cups of vanilla vodka to the other.
So it's time to start bottling here. I slice the apple's and put one or two in each bottle or jar. I also add a cinnamon stick to some. 


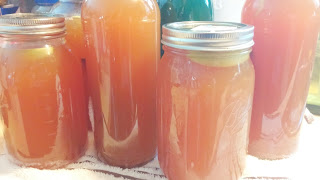
The first time we did this I put them all in cute mason jars. Now that I am into double batches I don't want to use that many mason jars so I put some into the Everclear bottles, some into vodka bottles, some into the cider jugs, and some into mason jars for gifts.  This is a great hostess gift for holiday visits. 


After you bottle or jar them... That's it!
Store them in a cool dark place for 2 weeks and after that you can enjoy. Its strong stuff. Don't drive!