Monday, May 26, 2014

Home made wild violet jellymade from flowers in the yard... easy and delicious

wild violet jelly home made
If you have sugar, a box of pectin and wild violets growing around your home... then you can make some delicious jelly. If you have canning jars... you can make it and have some on hand for the summer or as a sweet little gift for someone special.
wild violets perfect for making jelly


Gather about 3 cups of violets. Make sure you are collecting from a clean place where dogs don't pee and where chemicals are never sprayed. 
Put the violets in a heat proof jar or bowl or pan and cover them with 4 cups of boiling water and let them sit covered over night. You will notice a beautiful blue  color and the flowers will eventually go pale almost to white.
it turns such a beautiful blue while it's steeping


The next morning you strain your violet water through a coffee filter and then  heat your strained violet water with 3 tablespoons of lemon juice and one box of pectin. Watch when you put the lemon juice in because the water turns back to violet. Science. Cool. Bring this to a boil.

strain the violet water through a coffee filter in a funnel.


you're turning violet, violet!

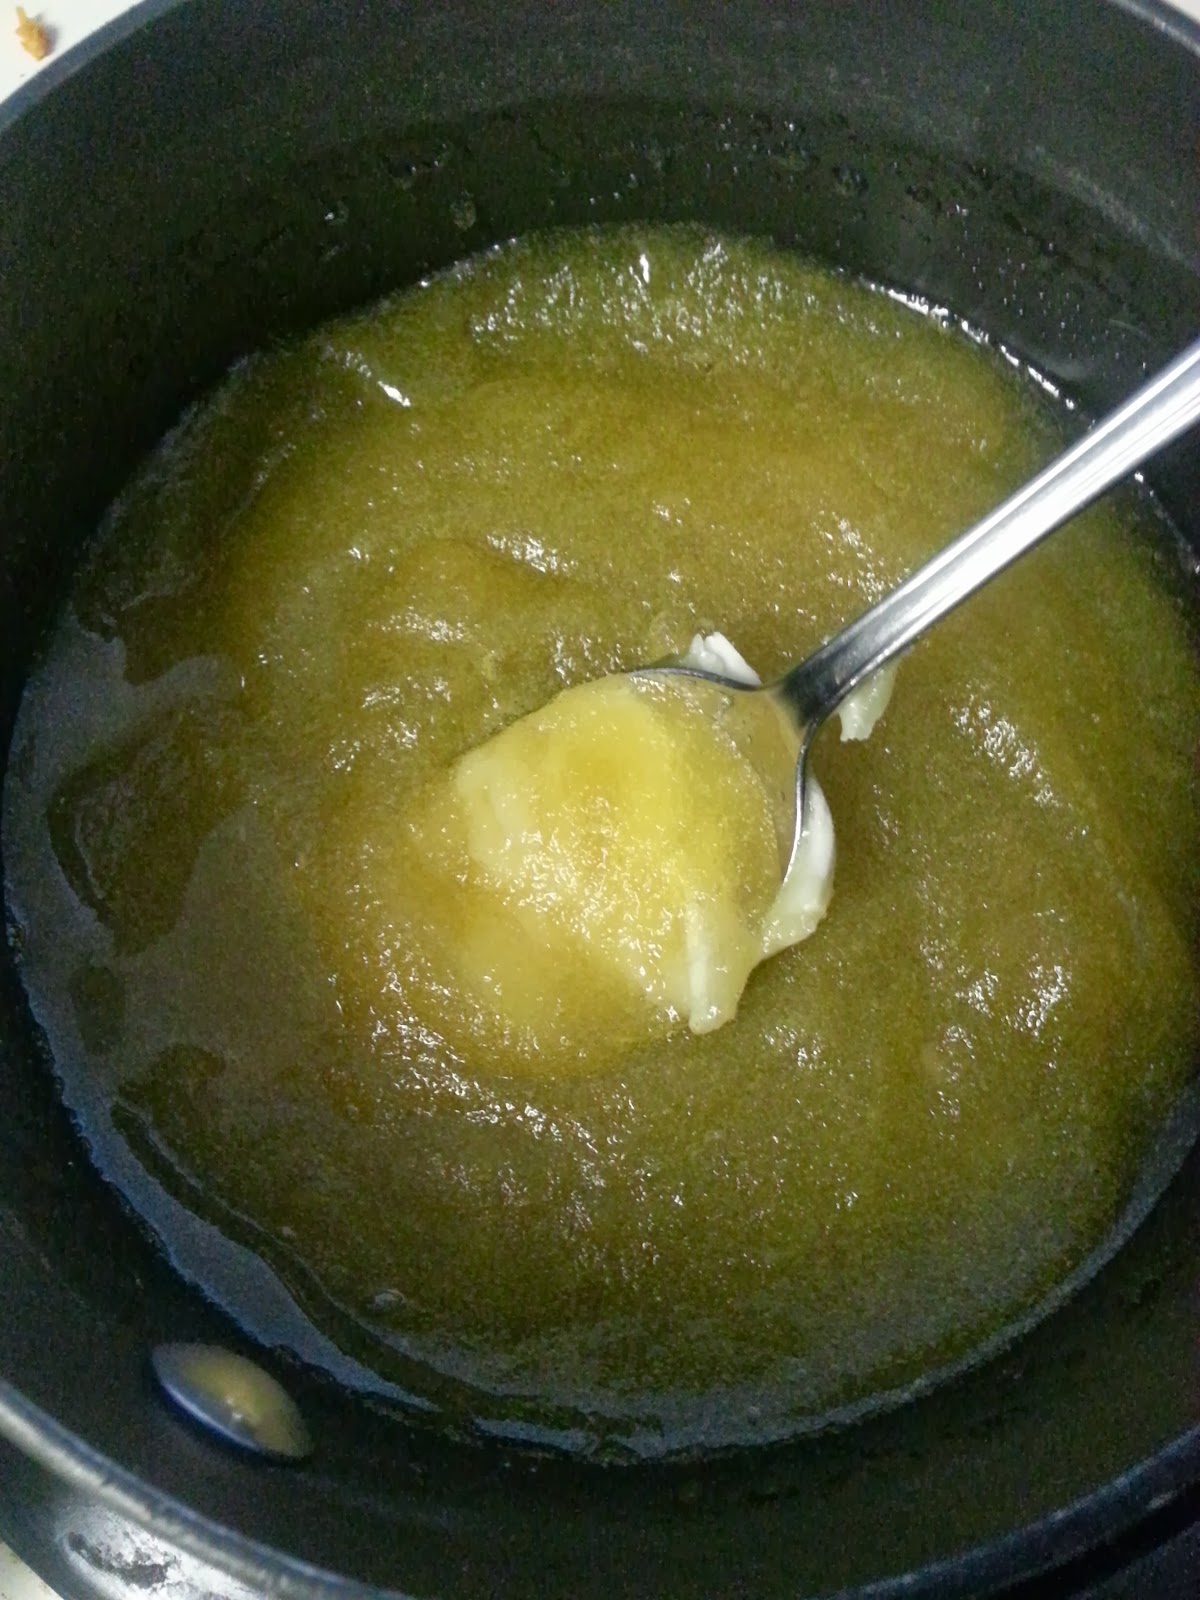
Once it boils add 3 to 3 1/2 cups of sugar in and whisk it while bringing it back to a boil. Let it boil for 2 full minutes. I use a timer only because I will lose track and ruin it.
Fill half pint jars with your violet jelly to a half inch from the rim. I get 5 half pints and a bit for breakfast from this recipe.
Water bath the jars for 15 mins you are done.
I love to let children help with picking the flowers because it makes them feel like they own this jelly and its fun to watch their first bite on a bit of toast.
I am also assuming you understand how to water bath canned food. If you are not, please take caution and learn how to do that part first. Canning and food safety is nothing to mess with.
water bath for the wild violet jelly


This Jelly is delicious on home made english muffins, too... click here.

Thursday, May 8, 2014

4 things you can make by re-using and re purposing a bath puff scrubbie thing.

So if we are going to be successful in a frugal homesteader lifestyle, we have to bear 3 things in mind.
1. Use what you have as often as possible.
2. Waste Not, Want Not (don't just throw stuff out).
3. Don't buy it if you can make it.


I have a never-used bath puff that was destined for the trash. Not a huge deal, right? Because I didn't pay for it (it came in a gift basket) and they are cheap. No biggie. But I did manage to stop myself and ask what else I could do with it.
I came upon the following cute and cool and frugal ideas from the web.


1. Make a pot scrubber.
re-using and re purposing a bath puff scrubbie

This will most likely be the project I go with. Great idea in my opinion from Salihan Crafts. She also shows how to make a Yarn Sleeve from the puff in this same post. 


1. (again) Here's a video tutorial on making a pot scubber for those of you who prefer video.


2. Make a costume.
re-using and re purposing a bath puff scrubbie

This clever idea comes to us from Razmataz Blog. The directions are easy and fun and are right here.


3. Make a shower hanger.
re-using and re purposing a bath puff scrubbie

This idea comes to us from the Instructables website. Click here for details. .


4. Make a bird feeder.
 

This video will show you how to do it with mesh produce bags, but if you take apart your bath puff, you'll find that it's the same thing. It's a mesh tube. 


As always, we'd love to see pics of how yours turned out or any other ideas you have for this concept!


Monday, April 28, 2014

Books that we love and books recommended by our blog tribe

This blog post will be saved for books. We love books! These are books that we recommend and also books recommended by people in our Heading Home Farms family of readers. If you have a book to share, please let us know. Recommended by Heading Home Farms. This book has some history and a great story and makes us glad we weren't born in the 1800's : )

Thursday, April 17, 2014

3 Healthy and Delicious and Fun and Colorful snack ideas.

1. Greek nachos.... really? You can imagine how good this will be right from the picture. This is so fresh and tasty and makes your tongue do a little dance.
Click here for the recipe from NotWithOutSalt.com. 


2. We will be making this this weekend. Basil Hummus Stuffed Mini Peppers. Seems perfect for movie watching when you need to keep popping things into your mouth but don't want to gain 25 pounds : )
Thanks SheKnows.com.


Monday, April 14, 2014

How my dryer got some balls


Dryer balls are good for several reasons. Here are the top 3:
1. They cut your drying time by about 15-20% on average because they keep your laundry fluffed up and separated and allow the heat to get to everything evenly.
2. You could eliminate using fabric softener and switch to vinegar quite comfortably because the wool helps prevent static and the gentle bouncing of the dryer balls softens your clothes.
3. If you love to hang your clothes outside to dry, but don't love your jeans and blankets feeling like cardboard, you could dry your clothes outside and pop them in the dryer for about 10 minutes with the balls and they will bounce the soft back into your clothes.

Making them is super simple. You need a skein of wool yarn. It needs to be 100% wool yarn because the wool felts together to make the balls solid. Wool also doesn't hold onto moisture.

You take the yarn and start winding it into balls. If you're new to this, you start by wrapping the yarn a few times around your fingers, then slide it off, pinch the ends between your fingers and start wrapping. Keep wrapping around and around making sure you turn the little baby ball frequently to avoid bunching and to make your ball.


I didn't make huge balls. They comfortably fit in the palm of my hand.


You can use a crotchet hook or a stick or scissors to poke the end of your yarn deep down into the center of your new dryer ball.

The you take your dryer balls and put them into the bottom part of a stocking. Put one in all the way to the bottom and knot the stocking, then put your next one in and knot, and so on and so forth until your balls are all firmly in your stocking. This step helps to keep the yarn in place until it felts up.


Now you wash and dry them at least 3 times with loads of laundry. Try to make at least two of these washings be in a hot water load. Just drop your dryer balls into the load of laundry and then into the dryer.

After 3 washes, you can see if they have felted into solid blobs. You can check right through the stockings and try to gently move a piece of yarn. Once it's solid, you can take them out and you are done.

Dryer balls just get thrown into your dryer with each load and they bounce around and work their magic. They last for ages.

Please share your story with us if you have been using them : )

Tuesday, April 1, 2014

Beef Bone Broth


I very frequently get these bones for our dog. I always boil them first because I can't imagine giving raw meet to my dog, even though in the wild it's all he would get,  and he eats old tissues from my wastebasket so I am sure he'd be fine. But all in all, I prefer to boil them first.

Imagine my homesteading horror when I realized what I have been dumping down the drain each time after I cook them.

Perfectly good BONE BROTH!!!!! Ack!

I have been searching for effective natural replacement for collagen for our faces as an ongoing companion for our face creams.
Plus something for healthier hair.
Plus something with protein. 
Plus bone broth has glycine, which makes our livers stronger.
Plus glucosamine and chondroitin for building muscle and repairing joint tissues.
Plus better nails (remember when everyone was drinking gelatin for nails and hair?)
Bone broth has all of these. It's a cold fighter sister to chicken soup with many gelatin and protein benefits.
Plus doggie gets a bone. Win Win.
The best method to get all of the minerals and healthy bits out of the meat is to let it cook for a long time at a lower heat. So crock pot is best here.

Put the bones in your crockpot and add a few finely chopped vegetable to make it taste the way you like. You can use celery, onions, potatoes, garlic, carrots, maybe ginger for as snappy taste...
The vegetables are better left in with the broth and enjoyed in each bowl, but you can always cook them in a cheesecloth or food grade food strainer and pull them out when cooking is over if you want pure broth that is easier to sip out of a cup.
Add 2-3 tablespoons of apple cider or regular vinegar. This helps draw the minerals and proteins out of the bones.
Put everything in the crock pot and cover with water and let it cook on low heat for 8-10 hours.
Then enjoy. A cup a day would be so good for you. Store leftovers in the fridge. If you have a ton of left overs, you can freeze it until you need it.


Tuesday, March 25, 2014

Homemade Shrinky Dinky Plastic... this was so fun (and cheap)!

This project turned out so fun that I just have to share it.
You need to save your P6 recyclable plastic containers for this. It's the stuff that salads and sandwiches and sometimes fruit comes in at the grocery store.
At the time we tried this, we only had one container that we shared between 5 people so our projects are truly dinky. We'll be saving more for next time.

Super easy.... you cut shapes out of the plastic that are about 4-5 times bigger than what you want them to end up being and let everyone color whatever they want with permanent markers.
You can use a whole punch if you want them to be attachable to key-chains or hung on string for necklaces.

Plus we attempted to make rings using strips of the sides of the plastic that started out as about 5 1/2 inches long.
Try to round out all corners because every sharp corner or jagged edge hardens into a thicker sharp corner and jagged edge.
Heat your oven to 350 degrees and line a cookie sheet with parchment paper. Avoid double wall cookie sheets.
Line your art on the sheets and pop into the oven for 2-3 minutes. 
They shrink down and thicken up into little plastic pieces of art. They look cool in the light. 
You can press them flat with an oven mitt if they are too curled up for your liking.

We made the ring by taking it out of the oven right away and wrapping it around a highlighter. This is definitely an adult only step. It's super hot but not as bad as you might think. They cool VERY quickly so wrap fast.


This is the beautiful butterfly one that my mom made.


This is a great project for the whole family, lots of fun (and even boys liked it) and we look forward to next time when we have more containers and therefore more plastic for everyone to experiment with.

Thursday, March 20, 2014

Making your own mascara for organic or allergy or money saving reasons.

Homemade is my favorite thing because it controls what we put in and on our bodies. Our homemade lip balm was the first product that we made and started selling like hot cakes because a lot of people agree with this mindset : )

Mascara has always bothered my eyes, so I don't wear it. If anyone SHOULD wear mascara, it's me because my eyelashes are tiny little itty bitty things that seem like they are the color of my skin. So I made some mascara following the recipe from ThankYourBody.com and loved it! 

I will give you the link to her blog as she deserves full credit and anything I do would just be copying her.

She gives a complete and easy to follow recipe and has feedback and questions from other people AND ideas for other colors besides black mascara. She has also gone through the trial period for us. Thank you.

I would love to hear from you if you have a story to tell about your own homemade mascara!

If you want to buy mascara tubes, you can click here.

To visit ThankYourBody.com's blog about how to do this, click here~


Monday, March 17, 2014

Golumpki Rolls... so delicious and easy to make

10 years ago in order to make me I'll I would have to buy almost every ingredient at the store during the week I wanted to make it. I bought a lot of pre-made meals and most of our food was processed somehow. We've come a long way since we bought our farm. And I truly do love it. I love having control over the food that we eat. And I love that as time goes by, we become less reliant on the world around us. Today I was able to make something where everything we needed was in our pantry with the exception of a 2 pound bag of sauerkraut . And to me - that rocks : )

 Here's what you need for the filling:
1 cup of hydrated hamburger rocks or 1/2 pound ground beef
1/4 cup hydrated onion or 1/2 cup chopped onion
Optional 1/4 cup dehydrated green bell pepper or 1/2 cup chopped green bell pepper
Salt and pepper to taste.
2 lb bag of sauerkraut 

 Heat up the hamburger, onion (bell pepper) and sauerkraut. Season to taste with salt and pepper. Set aside cool while you make the dough.
You will need:
1 packet of dry active yeast
4 1/2 cups flour (white, wheat or a mix of both)
1 cup milk
1/4 cup organic cane sugar
1/3 cup butter
1 tsp salt
2 eggs
Add 1 packet of dry active yeast and 2 cups of flour to your mixing bowl.
On the stove top you gently heat milk, sugar, and salt to 115 degrees. I always use thermometer for this because my judgement of warm is not good for this process and it has to be warm enough to activate the yeast but not too hot so that you kill the yeast. 
Once it reaches 115 degrees, remove from heat, add two eggs. 
Add this mixture to your mixing bowl  with yeast and flour and mix on a low speed for 30 seconds and then on high for 3 minutes . Stir in the remain 2 1/3 cups flour and kneed with the dough hook for 7 minutes.
Put the dough in an oiled bowl (I use my kitchenaid 5 1/2 quart bowl, just lift the dough out, oil the bowl and plop dough back in, cover with a clean tea towel) and let rise for one hour in a warm location.
After the hour, punch it down and roll it out on a lightly floured counter top till it's about one quarter inch thick. You cut the dough into four by four squares and add a large spoonful of the mixture into the middle of each square pull up the four corners and pinch. 
Then you put the balls seems side down on a baking stone or a glass baking pan let rise for another for 30 minutes.
Then you bake them at 375 for 30 minutes or until the golden brown. 
I served these with a sauce that i had warming while they baked. I put 16 ounces of pureed tomatoes or tomato sauce in a pan with 16 oz can of beef consume, some garlic, splash of Worcestershire sauce and salt and pepper.

Do It Yourself Bedroom Wall Decor Perpetual Autumn Dreams


We love the Fall. We would sleep in it all of the time if we could.
This wall treatment is my effort to capture that feeling for each night's sleep.
It was amazingly easy to do and I am so happy with it. Each night when we lay down to sleep, it feels like we're laying down under the stars and next to a tree with a warm gentle breeze : )
The tree is a wall decal that you can get at the bottom of this blog post.
It took about an hour to apply as it came in sections. The most time consuming part was trimming the paper. It was pretty easy.
Then we scattered the 3d leaves across the wall to give the illusion of movement. Also easy to install, just a screw into the wall. They are extra cool because they are 3d and add to the concept. I had extra leaves and I used them in my bathroom.
We also added those silly glow in the dark stars to our ceiling and used constellation shapes for the birthdays of our family. As the light goes out each night, we see the trees and then the stars. Ahhhhhh.....
I had extra leaves and I used them in my bathroom.
We would love to see and share any wall treatments you have done. Please send them to us at jenna@headinghomefarms.com.


You may also like our post on the DIY up-cycled kitchen island here.

Jewelry Organizer from a towel rack and shower curtain hooks.


Even the most steadfast homesteading chicks need to feel pretty every once in awhile.
 Jewelry accessorizes your day, your mood and your outfit. But not if it's all over your house and in different drawers and boxes. 
When I get ready in the morning, I am very seldom awake. It's better for me to have my jewelry out in the dressing part of my bathroom so I can put it on when I put on make up.
This is a glass shelf from Amazon with shower hooks to hang necklaces.
I do a lot of my shopping online because there are no stores close to me, plus I notice I buy less because there is no impulse buying.
On top I have assorted little baskets and bowls from around the house.
Now my stuff is in one place and I wear it more frequently because it's in my face convenient.


Friday, March 7, 2014

4 Home Made Dog Treat Recipes, (Biscuit, frozen, vegetarian, sweet potato or cookie)

This one is a home made frozen dog treat idea perfect for beating summer heat.
Brett Winn writes on HubPages, "In today's Internet age, it's the rare "dog mom" who hasn't purchased, made or at least heard about Frosty Paws® for dogs. Those who haven't have been missing out, or more perhaps accurately, their dogs have been missing out! Frosty Paws® are creamy, nutritious, healthful (but unfortunately somewhat expensive) frozen treats that dogs adore. Enjoyable year round, they're especially welcome in the summer months as they're the canine equivalent of ice cream. Homemade versions, which lack preservatives, are more healthful than store brands, and cost less as well!"

______________________________________________________________


SallysBakingAddiction.com has a great recipe for Home Made Peanut Butter Bacon Dog Treats.
 After all... bacon.
Sally write's, " After doing a lot of research on homemade dog treats, I confirmed with our vet that the combination of whole wheat flour, egg, milk, baking powder, oats, and peanut butter is perfectly healthy for a pup. I added chopped bacon because it completely drives him nuts."

________________________________________________________________________

Third, we have a vegetarian option from KingArthurFlour.com. They said, "Whether or not you have a vegetarian dog, these non-meat biscuits will be snapped up — literally! The recipe comes courtesy of King Arthur friend Elaine Aukstikalnis, who works in a veterinary office; Elaine regularly bakes these biscuits (which have been "vetted by the vet") to bring to work for "the patients."


__________________________________________________________________________

And fourth, we have an organic sweet potato treat that we make right on our own farm regularly for our family and for clients. You can check out how to make them right here...


Monday, February 10, 2014

making homemade yogurt in dehydrator

This weekend we decided to try making yogurt at home. To me, this isn't as much making yogurt as it is making yogurt into MORE yogurt, since you need to have some yogurt already to do this.

2 quarts milk
3/4 cup plain yogurt with live cultures

First you heat 2 quarts of milk (any kind of milk works) to 200 degrees fahrenheit. This part takes forever. The longest time is between 180 and 200 degrees for some reason. Also for some reason, I love the smell of super warm milk. As soon as it passed 150, I was in scent heaven. I did not use a double boiler because I have the patience of a flea but it also means constant stirring to prevent burning. I did fine without it, but it's not stupid to use one.

Get your dehydrator warming up to 120 degrees at this point. I also put my jars in the dehydrator now to get them warm.

As soon as it hit 200 degrees, you place the whole pan in a sink full of cold water to start dropping the temperature down to about 120 degrees. This happens fairly quickly, so have your yogurt starter ready. I put my 3/4 cup plain yogurt in at around 130 degrees because the yogurt was cold and I wasn't sure how fast it would drop the overall temp.

Once you hit 120 degrees, you place it in containers ( I use pint sized mason jars ) and pop it into dehydrator for 4 to 8 hours. The amount of time is dependent on how thick/creamy you like your yogurt. I checked mine at 6 hours and left it in for the whole 8 hours. I dried some banana chips and tomatoes while this was going to make best use of energy being spent having the dehydrator run. I know it's a nominal amount of energy, but I feel better making use of everything that I can.

It turned out really great. The flavor is also based on the type of starter yogurt that you use. I used greek yogurt. You may also get a skin on the top of your yogurt. I mixed mine in, but if you are turned off by it, you can toss it.
You will also notice that you created some whey. This can be separated by straining it. You can then use your whey to make bread. Or you can mix it in. I mixed mine in. 

I used some honey to sweeten my newly born yogurt and mixed in some canned cherries from this summer.

It turned out delicious. Even Hubby loved it.

Did I mention you could use this to make your own smoothies?


Wednesday, January 29, 2014

Our new dehydrator came in! Here come treats for us and our dog~

dehydrating bananas in excalibur dehydrator on Heading Home Farms

sweet potato dog treats in dehydrator on Heading Home Farms
We are so excited that our new Excalibur Dehydrator came in this weekend. We had some orders for dog treats that we needed to get filled. Plus we did banana chips and apple slices. We sprinkled the apple slices with cinnamon and did the banana chips straight up. We find (especially with this dehydrator) that we don't need to dip the fruit in anything prior to drying and I prefer that. The color change is nominal and the health levels with no additives are supreme.
For the dog treats, we slice sweet potatoes at around 1/4 inch thick and dry them to a pliable and leathery texture. Its a nice chew for dogs and our client's dogs love them. I got this quote from Modern Dog Magazine, which also speaks to making sweet potato treats, too. They say, "Sweet potatoes are a source of dietary fiber and contain vitamin B6, vitamin C, beta carotene and manganese. Most dogs love the chewy sweetness of a delicious dehydrated sweet potato treat. And you can rest easy knowing there's no additiives, preservatives or anything extraneous added." Click here to read their article.
I am looking forward to making fruit leather for the family and also yogurt leather per the instruction book that came with the dehydrator.
I love to dehydrate everything that would normally get wasted. Even left over tomato slices can be dried and stored to make tomato powder. We use tomato powder on pizza's, in soup, and canned dry meals.
What's your favorite thing to dehydrate?
Here's how to dehydrate apples. 

Monday, January 27, 2014

Homemade Gummy Vitamins for kids with Probiotics, too

finished vitamin and probiotic gummies
So this weekend we made a batch of homemade gummies with vitamins and probiotics. First let me speak to probiotics. Interestingly, a cashier in my grocery line was speaking to the lady in line in front of me and she was telling the lady in front of me about probiotics and told her that only liquid probiotics were any good because otherwise the probiotics were dry and therefore dead. This goes against everything I have learned. Yeast is dry on the shelf for months and is still live. I have bread that proves it. Plus if probiotics are live in liquid and not freeze dried, then they have to have something to live on while on the grocery shelf, example, wet yeast wouldn't make it once the sugar supply ran out if the yeast cells were on the shelf.
I am an advocate of dry probiotics which are freeze dried and waiting for "reanimation." Here's a link to an article that speaks to it. There are many such articles and you can make your own decisions.
So I wanted to have vitamins and probiotics in my gummies. I try to make enough for 2 - 4 weeks worth, max, so my little reanimated probiotics can flourish and still be alive when we eat them.

Also please note, I am not a doctor, I am sharing my experiences and thoughts. Please consult your doctor if you have questions or aren't sure what you are doing.

I use only organic bovine gelatin. It's an easy way to start of with a clean gummy that is healthy. You can smell how good it is when you use it!

Now here's the part where I am more persnickety than some on ingredients and portions.
If a dose of probiotics is x amount per person per dose and same with vitamins, then I don't think you should just mix a batch and pour it into molds and see how many you get. If I am adding enough vitamins for 18 doses, then I need to have it make 18 gummies. I am a stickler for that.
Fortunately, I know my molds and how many one batch will fill and I can add probiotics and vitamins accordingly.
So what I do is pour water into my molds and then put that water into measuring cups and know ahead of time how much I need to make.
I also use liquid vitamins instead of vitamin drops, so I know I need two tsp of vitamins per gummy... so if I am making 18 gummies, then that's how many tsps of vitamins I need.

I use these molds because they are big enough for the vitamin amount and also they can double serve for candy making. I don't need a set of gummy only molds. You can use what ever suits your fancy.
The recipe below fills 3 of the trays that I use. I put a teaspoon in the photo next to the finished gummies so you can determine size.


16 teaspoons organic gelatin
1 cup fruit juice (not pineapple)
2 tblsp organic honey (sweetens and gives the probiotics something to live on)
liquid vitamins
and probiotics

I do realize this isn't as tidy as recipes that give a definitive amount, because it is defendent on the size of the molds that you use. That will determine how many vitamins and probiotics.
16 tsps gelatin and 1 cup juice and honey and vitamins make almost 2 cups of liquid. If your molds hold less, then feel free to cut in half.
Just please remember to use vitamin amounts equal to how many gummies you are making.

Add gelatin and juice and honey to a pan and heat until the gelatin dissolves. It starts out very thick and thins out way before boiling. Photos are below.
Then stir and cool if needed (you really shouldn't have to cool that much) just so that it doesn't kill the probiotics. Add vitamins and probiotics and mix well and pour them into your molds.
Pop the molds into the freezer for 10 mins to help set and remove from molds.
There you have it! I store mine in fridge and make only 2-4 weeks at a time.

the gelatin, juice and honey is very thick at first

the liquids melting with the gelatin thins out as it warms.