Tuesday, December 31, 2013

Home Made Butter is so easy and so yummy

Today I spontaneously wanted to make bread. I didn't have milk. My whey was frozen from the last time we made cheese. I did, however, have two extra half pints of heavy cream left over from Christmas that was in danger of going to waste. So to use the cream, have delicious home made butter for the warm bread, and to get the butter milk that we need to make the bread, we made butter. I am still surprised when people are surprised that you can make butter at home.
When we were little, every Easter weekend our mom had us make butter in a cleaned out mayonnaise jar. You put the cream in the clean jar, add a half teaspoon of salt and then start shaking. Everyone got a turn shaking. And then everyone got two turns. And then everyone got three turns with bonus opportunities to pursue acting careers while each of us kids started rolling on the floor complaining about arm cramps and feeling faint. It did take a long time. Still, we would never give up those memories.
So today I use my KitchenAid Mixer since I don't have enough family in the house to make into jar shakers.
I put both half pints into my mixer bowl, half teaspoon of salt, and mixed using whisk attachment at speed 4 for about 5 minutes until it turned into whipped cream.
Then you just keep going... mixing on speed 4.
It takes about 12 minutes from when you have cream to get it into butter. You can see the changes as it thickens and then kinda slaps the bowl and then gets thick and slightly yellow. At 10 minutes I turn the speed down to 2 so that when the buttermilk starts to separate, I am not just beating it back in. After what feels like forever (but without the sore arms) your butter will suddenly start separating from the buttermilk. Keep mixing for another 2 mins and then you have really delicious butter. Plus buttermilk that is perfect for making bread.
I then put the whole thing in a fine strainer lined with paper coffee filters. You need to drain and then press as much buttermilk out as you can. This helps it last longer.
My bread is in for second rising, then a half hour to bake and then fresh, hot bread ready to smother with home made butter. What a perfect thing for this snowy winter day.
heavy cream in the bowl with a half teaspoon of salt
just starting to peak into whipped cream
it's starts to thicken, slightly yellow, and is butter that hasn't separated yet
the buttermilk is separating now.
home made butter. press as much buttermilk out as you can to help preserve it.


Saturday, December 14, 2013

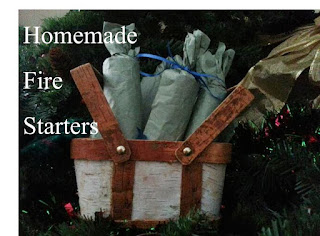
Homemade Fire Starters from toilet paper rolls and dryer lint, and they can be cute!

homamde firestarters for campfires and woodburning stoves

Fire starters are a handy tool. I am proud to say that I don't struggle to get our wood burning stove started without them. (Adding that badge to my homesteading woman sash.) Fire starters, though, make the job cleaner and easier with less paper needed and therefore less ashes to clean. I do recommend doing this in fall since the dryer lint kicks up dust. Doing it outside is smarter than, oh say, doing it on a box of Christmas decorations as is evidence of what I did today in the pics below. 

You will need:
Empty toilet rolls and or paper towel rolls cut into thirds.
Dryer lint.
Candle wax from candle stubs or remnants.
Paper, newspaper or packing paper.

Stuff the toilet paper rolls with dryer lint. Then pour melted candle wax over one end. Most people use way more wax than I do. I only put about 1 or 2 teaspoons in. I don't want to find cakes of wax on the bottom of my stove and I don't feel it is necessary. But so you know, a lot of people use more. You can adjust according to what you think you need.
After the wax dries, you lay each tube on some paper and roll them up like little old-timey gifts. If you want to get fancy, you can tie the ends with ribbon or twine. Mine won't be left out long enough for that. But next fall when I make them OUTSIDE and make enough for the whole season, I will make them cuter.
Please be mindful of fire safety and use common sense and best practices whenever you have a fire.  
To make fire starters, you will need dryer lint, candle wax, packaging paper, and paper product tubes.
I don't use tons of wax. 
Lay the filled fire starter tube on the paper to wrap it. Make sure paper is a few inches wider than the tubes.
RRRRRRRoll it up, maybe 4-5 layers is plenty.
Twist the ends like candy wrappers. This is also where you will light them.
Ribbons if they are going to be gifts or left out in your house for awhile. Just or twine would be even better.
Your own home made fire starters.


Friday, December 6, 2013

Homemade Fruit Smoothies in a mason jar... (and tetrazzini leftovers, too)

Today was an extra long day in the office so we are having leftover leftovers plus making a big batch of smoothies. The smoothies should cover us for 2 or 3 weeks. Its December and cold and I have to be creative to get fruit in hubby's tummy. Smoothies will get this done. Plus it is the only way to get yogurt in him and I think he needs the probiotics.
I am also determined to NOT buy a blender because I feel I can make my KitchenAid Mixer fit every need. Except food processor.  I am struggling with that. Kitchenaid can't chop my onions. Yet. 
But with the homesteader mindset, I can't just run out will-nilly and buy something. I have to try to make do with what I have. (I wish I started homesteading after I purchased a blender/food processor)
For dinner, we are having leftover tetrazinni. The tetrazzini turned out a-amazing. We followed a recipe from The Pioneer Woman and it was great! Perfect use for leftover Thanksgiving turkey. We also had some left over tetrazzini so today I fried it up, added 3 eggs and fried it some more. ( don't forget to save your eggshells for dog food ).
On to the smoothies. In summer we use fresh fruit. Now that its winter I should be using my canned fruit but I didn't can enough for this volume so we are using frozen fruit (sigh). We used:

2 large bags of frozen mixed fruit including strawberries, blueberries, raspberries and bananas. You can use whatever you like.
2 24 oz containers of plain Greek yogurt. (you could make your own here)
1 cup chia seeds.
3/4 cup honey.

I ran the fruit through my Kitchenaid Meat Grinder Attachment accessory. Yep. Meat grinder. The attachment came with a meat grinder and a fruit strainer. I love the fruit strainer and use it often. Normally I would take fresh fruit and smash it all through the strainer because it gets all the seeds and leaves and pits out. But it's also a pain to get the little raspberry seeds out at cleaning time and the frozen fruit is clean so I gave the meet grinder a try and it was perfect. Grinding the fruit and hand mixing it with everything else eliminated need for a blender. Yay!
So like I said, take your ground fruit and mix in remaining ingredients. This pretty much filled my 5 1/2 quart mixing bowl.
Now you can plop it into mason jars. I used half pints because that's what I had on hand today. If you leave a good inch of headspace, then you can put them in the freezer which allows for you to stretch this out to last for a few weeks. Take a jar out night before and put it in the fridge and then you have a healthy breakfast to grab on the way to work.
This quantity filled a dozen half pints and also a few cup sized plastic containers that we used because we ran out of jars.
Fruit Smoothies in jars (and containers) and ready to freeze.
Turkey Tetrazzini, refried. Yum!
Fruit going through the meat grinder~
Add remaining ingredients to the fruit~
Smoothies smoothed out and waiting to jar~

Tuesday, December 3, 2013

Homemade Beef Jerky * Fail *

Ugh... My beef jerky project is an epic fail. It tastes like boring, mossy bark.
I had no clue how to make it. But I imagined the joy of my assorted men as they happily chawed on bits of jerky, soooo much better than any store bought stuff. I pondered canning in in tiny half pint jars to ration it as they eagerly asked for more and more. I envisioned the various hiding places I would store it in and then randomly pull out a jar much to the delight of the room.
I wondered if it would somehow get included in various family member's annual Christmas letters. I was sure it would show up in funny family pics as accidental banter.... "We were chewing on mom's famous jerky when suddenly __________ ".
I was confident that a major food label would be in contact with me shortly and I could retire.
Yeah, no. It was crunchy pieces of cardboard from a shipping box that was handled by many delivery people. It was bark. Tree bark that was dry and only touched by squirrel feet. Waaaahhhhh!
So I won't share the recipe source to protect the innocent. I am sure it was me somehow. I used worstechire sauce,  liquid smoke, soy sauce, some brown sugar, salt, pepper and massively expensive London Broil. Which I had to ask for. Because I don't fully understand meat. I asked the butcher for a slab of it. And I foolishly didn't ask for it to be sliced because it was more home steady to do that myself using the partial freezing technique. My arm still hurts.
I marinated it for 18 hours which was 6 more than suggested. It smelled awesome!!!!! I checked to make sure my mail was available for the major food labels benefit, easy to get a hold of me and all.
I don't have a dehydrator so I used oven method which was 250° for 4 hours. Then, since I didn't have a drying rack, I rigged the most ingenious system of using shishkabob skewers and hang in the meat THROUGH the oven rack which I moved to top position. I was so set.
At 3 hours they were already getting crumbly and were definitely dry, so we pulled them out and got ready for the first bite that we would always remember.... And all it was was meh.

Monday, December 2, 2013

Homemade Sugar Scrub


We are making homemade baskets for Christmas gifts this year. Sugar scrub is fairly easy to make, really works wonders on your skin, and looks ADORABLE in the bottles!


6 cups sugar
1 cup almond oil
21 drops essential oils
coloring if desired
containers

Place sugar in a big plastic or glass bowl. Slowly start mixing in the almond oil. Do it in quarter cups at the most to prevent clumping.
Next you add the essential oils of your choice and continue mixing. I used peppermint this time because it's going in Christmas baskets.
If you want color, add a few drops of food coloring here. Maybe 7-10 drops at the most. I divided mine into two batches for the multi layer affect, going for a candy cane look... again... Christmas : )
You can obviously use any containers that you want. Be mindful of moist sugar being in metal containers, I don't advise that. I chose really cute plastic bottles with cork tops. They feel like quality bottles and won't break in the bathroom. I got mine here.
I filled my bottles with multiple layers of the pink and the white. I made a funnel out of a paper plate since my regular funnel kept clogging and my canning funnel is too big for these bottles.
Keep layering, cork the bottle and you are done!

Friday, November 29, 2013

Mason Jar No Spill Drinking Glasses


Making a pickle jar and mason jar into fun summer or wedding glasses is very easy.

They are my hubby's favorite glass to use. Although in the summer one may choose to have a cover on their drink to keep it cold and keep the bugs out.

You can use mason jars with the lids and rings or you can use pickle (or any grocery) jar with a lid that screws back on nicely.

Quarter inch grommets are the best for this purpose. I took a pickle jar washed it out and pushed a screwdriver carefully through the top. Then I fanagled  the grommet through the whole. Quarter inch grommets fit straws perfectly and protect everybody from sharp edges. Next step is to fill with an icy summer drink and off we go!


Homemade Dog Food


Today we are making turkey tetrazzini with our Thanksgiving leftovers. We are also getting some beef jerky marinating overnight AND we are making dog food.
Please note I am not a vet or a doctor. Should you decide to make your own dog food you should check with your veterinarian.
Our crazy rescued dog has a sensitive stomach and we get dry dog food made for sensitive stomach dogs. We supplement his dry dog food with a good sized scoop of homemade soft food. I like the soft food because he likes it, because it is homemade, and because it is usually poultry and rice heavy which helps his stomach. I like to can it because we then have many cans in the house should we get snowed in. Plus it uses leftovers that I normally wouldn't know what to do with.
I have a gallon sized freezer bag going at all times in the freezer. I fill it over time with egg shells, chicken carcass, and left over vegetables and meat scraps.
When we have enough stuff to make a batch of dog food then we defrost it the night before.
We put it all in the pressure canner with broth and a few cups of brown rice and we pressure cook it for 90 minutes. This cooks it enough so that even the bones become soft and it can all go through the grinder. I check the bones to make sure they break easily when pressure with a spoon. I take out any large bones that don't break.


We grind it as soon as it is not screaming hot. I use my KitchenAid with the KitchenAid meat grinder attachment. Grind away and then put it in pint size canning jars. It should still be pretty warm. 

Getting ready to push on the bone to make sure it breaks easily.


Leave a very generous inch of head space because the rice still expands even though its already cooked. We also add broth at this step to help fill in the air holes. Notice in the photo that we use a skewer to poke through everything to eliminate even more air holes.


Wipe the rims with paper towel dipped in vinegar. Place hot lids on Pint Jars and tighten the lids finger tight.  We treat this as cold pack and put it in the Pressure Canner with warm water and heat the water and cans together.
I want to point out here that this is "rebel" canning and does not follow approved canning methods. Experienced canners can make their own decisions on when they can stray from approved methods at their own risk.
I process at 15 lbs for 75 minutes. Follow the times and weights for your elevation and times for meats.
Ready to Pressure Can

Wednesday, November 27, 2013

Body Butter

Tonight I am making more Body Butter. We had included it Christmas gift baskets and it got wonderful reviews! I love this stuff. It is clean and full of moisture and has no chemicals so skin drinks it in.
Melt the shea butter and coconut oil together. The best method for this is to melt them in a double boiler or set a quart sized canning jar in a sauce pan and boil the water. Once the oils melts, remove from heat and let sit for 1/2 hour to cool.
After the half hour, add the almond oil and emu oil if you have it. The emu oil can be left out. This is also the time to add your essential oils. I chose cinnamon bark for this batch.
Put it all in your mixer bowl and put in freezer for 30 minutes. This jump starts the set.
Whip until the mixture feels buttery. I used my KitchenAid Mixer with Wire Whisk . While mixing, if it clumps too much or is just sticking to the wisk, you add infused olive oil one tablespoon at a time until it literally reaches the consistancy of butter. I chose white clover infused olive oil that I have going on my windowsill at all times. If you don't have infused oil, you can use regular olive oil or even more almond oil. Just be sure to add conservatively. You can see how it peaks off the wisk in the photo.
And that's it. You have body butter that is creamy and feels wonderful on your skin. You can store in glass jars and they make wonderful gifts. I store mine that I keep in empty coconut oil jars.
Creamy like butta on the mixer whisk.
Use any essentials oils that you like. These were my choice for today.
Homemade Body Butter.