Showing posts with label homemade. Show all posts

Thursday, May 12, 2016

Making Almond Milk at Home


This recipe doesn't fall under the cheaper category. It does fall under healthier because you know what's in it category.
Let's make home made almond milk!
It's pretty easy and doesn't involve a lot of work. Most of it is time... time to soak the almonds, time to stain the almonds, etc.

 Here's what you need:

2 cups raw and organic almonds
A bowl of water
4 cups water (not included in the soaking water)
Agave Syrup
  • Place the almonds in a bowl and cover with about an inch of water. They will plump as they absorb water. The almond milk is creamier when you let them soak longer so shoot for about 18 hours if you can. We did it over night and through the next morning.
  • Drain the almonds and rinse them off. They will be all puffy. Perfect! Discard the soaking water because it contains phytic acid, which affects the body's ability to absorb nutrients.
  •  Place the almonds in the blender and cover with 4 cups of water. You can do two bacthes in the blender here if your belnder isn't big enough or strong enough.
  • Blend at the high speed for 2 minutes. The water will turn white and the almonds will be reduced to tiny tiny tiny pieces.

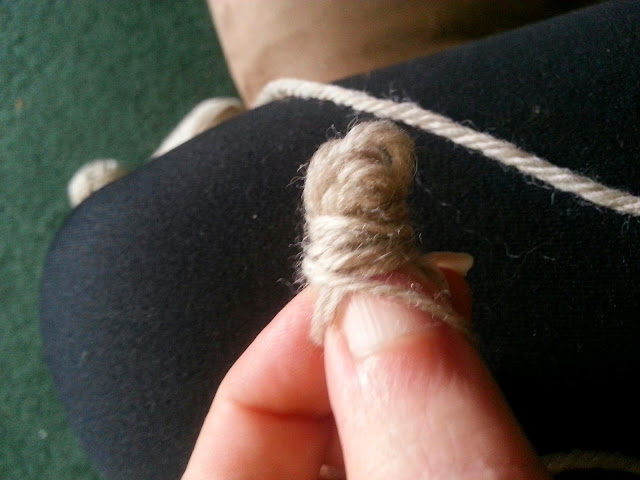
  • Strain the almonds through cheese cloth or any other very fine strainer that you would use for jelly.

  • After it has drained for about 15 mins, then gather up the material around the remaining paste and press or squeeze as hard as you can. I choose to put a small plate on top and then put a heavy weight on top of that. I let it sit for another 15 minutes.


  • Add your agave to taste. I added 5 drops at a time and taste tested it as we went along. In our house, 20 drops was the go to amount for this much almond milk.
  • Seal up what ever you aren't drinking right now and store it in the fridge for 2-3 days.
  • I also put some in the freezer, but we haven't tried that yet to let you know how it worked. I will update when we do.
Now here's the part where you can be super frugal. You can make the remaining almond paste into almond flour which is great for baking. Spread the left over almond paste into very thin layers onto your dehydrator tray (as though you were making fruit roll ups) and dehydrate at 120 for about 8 hours. 
Dehydrating time will totally vary based on how wet and or thin yours is. So check it at 8 hours and run it for more if you need to. You should have super dry chips when you're done. Run these through a coffee or herb grinder until it's floury dust and store in air tight container.

Let us know how yours turns out. We love it and are very happy to know the origin of our food and exactly what's in it!


Monday, November 23, 2015

My Husband's Favorite Homemade Cranberry Sauce

Homemade Cranberry Sauce

You need:
2 lbs cranberries
3 cups cranberry juice
3/4 cups orange juice
12 oz maple syrup ( not pancake syrup)
1 to 1 1/2 cups sugar (one cup until you taste the syrup and decide for yourself)

Rinse your berries. Remove any little sticks and bad berries. 

I also get the water bath canner ready now. Get the water hot. Make sure you have rack on the bottom of your water bath pan. I am using a smaller pot this time and I don't have a rack that fits so I am using canning lids. 

Have 5 sanitized pint jars ready.

Put all of the ingredients in a large pot. Ours is a less sweet recipe. You can take a quick taste of your liquid now and add the additional half cup of sugar now if you would like.


Put it on high heat and bring to a rapid rolling boil stirring constantly.
removing foam when making cranberry sauce


cranberries start to pop when making cranberry sauce
The berries will start popping while they split open. It needs to be a true rapid and rolling boil to start releasing the pectin from the berries. 

Turn the Heat down to medium low and simmer for 10 minutes. I use this time to skim some of the foam out. I am not that worried about the foam. If you are a perfectionist... There are a few ideas to get rid of almost all the foam here

To us is not important.
After the 10 minutes you start filling your point jars. This batch will fill 4 pints jars with just enough left over for a tasting. 
canning cranberry sauce

Put the point jars in your water bath. Make sure the water covers the jar, pot your plus on and raise the heat so the water boils.
waterbath canning homemade cranberry sauce

 Time for 15 minutes. After 15 minutes turn the heat off. Remove your jars and wait for those beautiful pings. 


Monday, November 9, 2015

Apple pie moonshine


This recipe for Apple Pie Moonshine is a culmination of various recipes that we have tried over the years and have adapted to suit our taste. We certainly aren't saying we invented it. We aren't trying to take credit for anyone's recipe. There are so many recipes out there. 
Last year's batch wasn't strong enough for hubby's liking. The year before that it was too sweet. This year we are going to try adding the spiced rum that seems to be big this year..
The recipe listed above is a pretty big batch. Almost double many that are out there. This one makes around 10 quarts.  So feel free to cut it in half if you are just starting out.

2 gallons of cider
40 oz Apple juice
Cinnamon sticks (2 for the pot and one for each container that you will use)
4 cups white sugar
4 cups brown sugar
2 liters Everclear
2 to 3 cups Captain Morgan Spiced Rum
2 to 4 apples (green and red are our favorites)1 to 3 cups vanilla vodka


 Pour both gallons of Apple cider into a large stock pot. Add the brown and white sugar and two cinnamon sticks and simmer on low heat for 10 minutes stirring almost constantly until the sugar dissolves. You can tell when the sugar melts because you won't feel that gritty feeling at the bottom of the pot with your spoon when you stir.
Then turn the heat up to medium high and bring it almost to a boil stirring frequently. Just before it boils (you'll see it starting to steam) turn the heat down to a low simmer and simmer for 1 hour. Keep stirring occasionally. I don't cover mine during this process because I like to have it reduce slightly.
Then you remove it from the heat and let it sit until room temperature.


Right around now I divide it two pots so that I have room to add the alcohol. You have to be very patient here. It needs to cool all the way down to room temp or you will accidentally be burning off alcohol content.
When it's at room temp, you can add 1 liter of Everclear to each half pot now. I am also adding half the bottle of captain Morgan to one and about 2 to 3 cups of vanilla vodka to the other.
So it's time to start bottling here. I slice the apple's and put one or two in each bottle or jar. I also add a cinnamon stick to some. 


The first time we did this I put them all in cute mason jars. Now that I am into double batches I don't want to use that many mason jars so I put some into the Everclear bottles, some into vodka bottles, some into the cider jugs, and some into mason jars for gifts.  This is a great hostess gift for holiday visits. 


After you bottle or jar them... That's it!
Store them in a cool dark place for 2 weeks and after that you can enjoy. Its strong stuff. Don't drive!

Monday, May 26, 2014

Home made wild violet jellymade from flowers in the yard... easy and delicious

wild violet jelly home made
If you have sugar, a box of pectin and wild violets growing around your home... then you can make some delicious jelly. If you have canning jars... you can make it and have some on hand for the summer or as a sweet little gift for someone special.
wild violets perfect for making jelly


Gather about 3 cups of violets. Make sure you are collecting from a clean place where dogs don't pee and where chemicals are never sprayed. 
Put the violets in a heat proof jar or bowl or pan and cover them with 4 cups of boiling water and let them sit covered over night. You will notice a beautiful blue  color and the flowers will eventually go pale almost to white.
it turns such a beautiful blue while it's steeping


The next morning you strain your violet water through a coffee filter and then  heat your strained violet water with 3 tablespoons of lemon juice and one box of pectin. Watch when you put the lemon juice in because the water turns back to violet. Science. Cool. Bring this to a boil.

strain the violet water through a coffee filter in a funnel.


you're turning violet, violet!

Once it boils add 3 to 3 1/2 cups of sugar in and whisk it while bringing it back to a boil. Let it boil for 2 full minutes. I use a timer only because I will lose track and ruin it.
Fill half pint jars with your violet jelly to a half inch from the rim. I get 5 half pints and a bit for breakfast from this recipe.
Water bath the jars for 15 mins you are done.
I love to let children help with picking the flowers because it makes them feel like they own this jelly and its fun to watch their first bite on a bit of toast.
I am also assuming you understand how to water bath canned food. If you are not, please take caution and learn how to do that part first. Canning and food safety is nothing to mess with.
water bath for the wild violet jelly


This Jelly is delicious on home made english muffins, too... click here.

Monday, April 14, 2014

How my dryer got some balls


Dryer balls are good for several reasons. Here are the top 3:
1. They cut your drying time by about 15-20% on average because they keep your laundry fluffed up and separated and allow the heat to get to everything evenly.
2. You could eliminate using fabric softener and switch to vinegar quite comfortably because the wool helps prevent static and the gentle bouncing of the dryer balls softens your clothes.
3. If you love to hang your clothes outside to dry, but don't love your jeans and blankets feeling like cardboard, you could dry your clothes outside and pop them in the dryer for about 10 minutes with the balls and they will bounce the soft back into your clothes.

Making them is super simple. You need a skein of wool yarn. It needs to be 100% wool yarn because the wool felts together to make the balls solid. Wool also doesn't hold onto moisture.

You take the yarn and start winding it into balls. If you're new to this, you start by wrapping the yarn a few times around your fingers, then slide it off, pinch the ends between your fingers and start wrapping. Keep wrapping around and around making sure you turn the little baby ball frequently to avoid bunching and to make your ball.


I didn't make huge balls. They comfortably fit in the palm of my hand.


You can use a crotchet hook or a stick or scissors to poke the end of your yarn deep down into the center of your new dryer ball.

The you take your dryer balls and put them into the bottom part of a stocking. Put one in all the way to the bottom and knot the stocking, then put your next one in and knot, and so on and so forth until your balls are all firmly in your stocking. This step helps to keep the yarn in place until it felts up.


Now you wash and dry them at least 3 times with loads of laundry. Try to make at least two of these washings be in a hot water load. Just drop your dryer balls into the load of laundry and then into the dryer.

After 3 washes, you can see if they have felted into solid blobs. You can check right through the stockings and try to gently move a piece of yarn. Once it's solid, you can take them out and you are done.

Dryer balls just get thrown into your dryer with each load and they bounce around and work their magic. They last for ages.

Please share your story with us if you have been using them : )

Tuesday, April 1, 2014

Beef Bone Broth


I very frequently get these bones for our dog. I always boil them first because I can't imagine giving raw meet to my dog, even though in the wild it's all he would get,  and he eats old tissues from my wastebasket so I am sure he'd be fine. But all in all, I prefer to boil them first.

Imagine my homesteading horror when I realized what I have been dumping down the drain each time after I cook them.

Perfectly good BONE BROTH!!!!! Ack!

I have been searching for effective natural replacement for collagen for our faces as an ongoing companion for our face creams.
Plus something for healthier hair.
Plus something with protein. 
Plus bone broth has glycine, which makes our livers stronger.
Plus glucosamine and chondroitin for building muscle and repairing joint tissues.
Plus better nails (remember when everyone was drinking gelatin for nails and hair?)
Bone broth has all of these. It's a cold fighter sister to chicken soup with many gelatin and protein benefits.
Plus doggie gets a bone. Win Win.
The best method to get all of the minerals and healthy bits out of the meat is to let it cook for a long time at a lower heat. So crock pot is best here.

Put the bones in your crockpot and add a few finely chopped vegetable to make it taste the way you like. You can use celery, onions, potatoes, garlic, carrots, maybe ginger for as snappy taste...
The vegetables are better left in with the broth and enjoyed in each bowl, but you can always cook them in a cheesecloth or food grade food strainer and pull them out when cooking is over if you want pure broth that is easier to sip out of a cup.
Add 2-3 tablespoons of apple cider or regular vinegar. This helps draw the minerals and proteins out of the bones.
Put everything in the crock pot and cover with water and let it cook on low heat for 8-10 hours.
Then enjoy. A cup a day would be so good for you. Store leftovers in the fridge. If you have a ton of left overs, you can freeze it until you need it.


Tuesday, March 25, 2014

Homemade Shrinky Dinky Plastic... this was so fun (and cheap)!

This project turned out so fun that I just have to share it.
You need to save your P6 recyclable plastic containers for this. It's the stuff that salads and sandwiches and sometimes fruit comes in at the grocery store.
At the time we tried this, we only had one container that we shared between 5 people so our projects are truly dinky. We'll be saving more for next time.

Super easy.... you cut shapes out of the plastic that are about 4-5 times bigger than what you want them to end up being and let everyone color whatever they want with permanent markers.
You can use a whole punch if you want them to be attachable to key-chains or hung on string for necklaces.

Plus we attempted to make rings using strips of the sides of the plastic that started out as about 5 1/2 inches long.
Try to round out all corners because every sharp corner or jagged edge hardens into a thicker sharp corner and jagged edge.
Heat your oven to 350 degrees and line a cookie sheet with parchment paper. Avoid double wall cookie sheets.
Line your art on the sheets and pop into the oven for 2-3 minutes. 
They shrink down and thicken up into little plastic pieces of art. They look cool in the light. 
You can press them flat with an oven mitt if they are too curled up for your liking.

We made the ring by taking it out of the oven right away and wrapping it around a highlighter. This is definitely an adult only step. It's super hot but not as bad as you might think. They cool VERY quickly so wrap fast.


This is the beautiful butterfly one that my mom made.


This is a great project for the whole family, lots of fun (and even boys liked it) and we look forward to next time when we have more containers and therefore more plastic for everyone to experiment with.